Table of Contents
We are back again with another iteration of How It Was Made, this time featuring insights from a mainstay on the Colorize label, Kaiyan. He first came to my radar about a year ago when we hosted a mix of his on our Soundcloud, and it was one of the highlights of last year’s mixes. And especially considering that the mix was packed with his original productions, I have long since been curious about how he works his magic in the studio.
So when he had his latest EP drop, once again on Colorize, I figured there was no better opportunity to unpack his favorite plugins and what he does with them. His answer floored me, if anything, because of the absolute detail he dove into while sharing everything he knows about popular synths like Serum, Trackspacer, and Ableton’s Operator, all to make some of the best progressive houses in the game right now.
So take a listen to”Never Felt Like This” below to acclimate your ears to how the track sounds, and then let’s unpack what he had to say in the latest iteration of How It Was Made: Kaiyan—Never Felt Like This.
Serum
I usually keep it pretty simple with my basses, I try not to overcomplicate things unnecessarily, particularly for this genre of music. A large majority of my bass layers originate from Serum. I’ve been using Serum since I first started producing, so I feel the most comfortable using it.
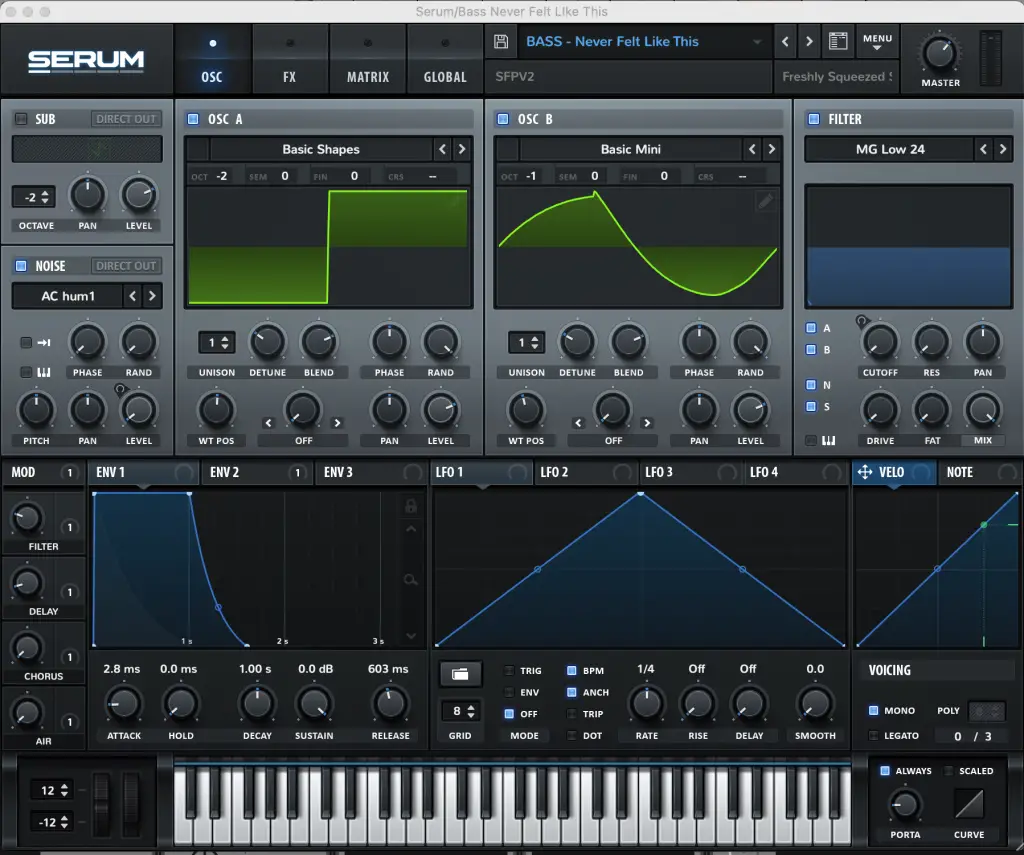
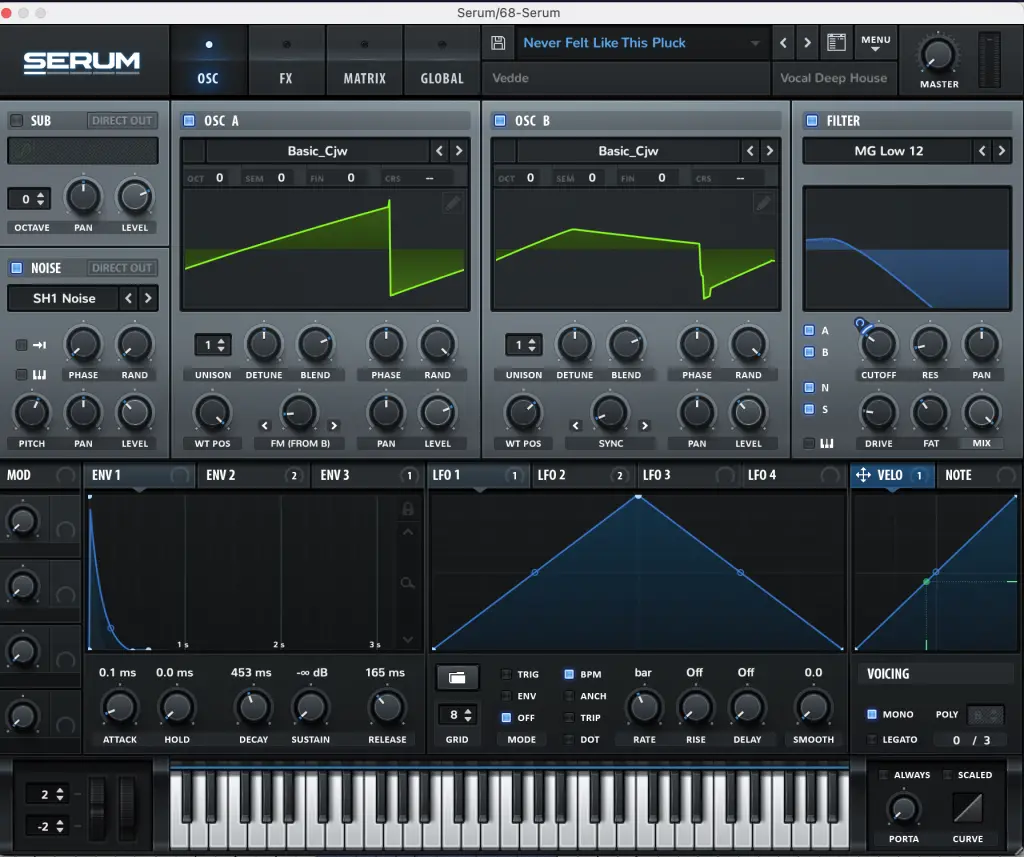
You’ve probably heard this saying a few times, but as Bruce Lee once famously said, he fears a man who hasn’t practiced one thousand kicks for one time, but rather one kick a thousand times – the same goes for plugins, once you’ve familiarized yourself with a particular set of plugins/synths learn to master them rather than having hundreds of plugins and not knowing what to do with them. For the main lower bass sound, in Never Felt Like This, I have a Square wave on Osc A and then a slightly advanced wavetable of a Sine Wave on Osc B. The positioning of this Sine Wave wavetable on Osc B provides a more analog grit to the first oscillator.
I usually set my foundational bass layers all in mono. Under the MOD section, I have a macro where Envelope 1 is assigned to the Cut Off Filter, with the filter being applied to both Oscillators, allowing the envelope to dictate the sound of the bass. This gives me the flexibility to open up the filter and, consequently, the frequency of the bass – which is a perfect storm when you’re looking to create contrast in your track.
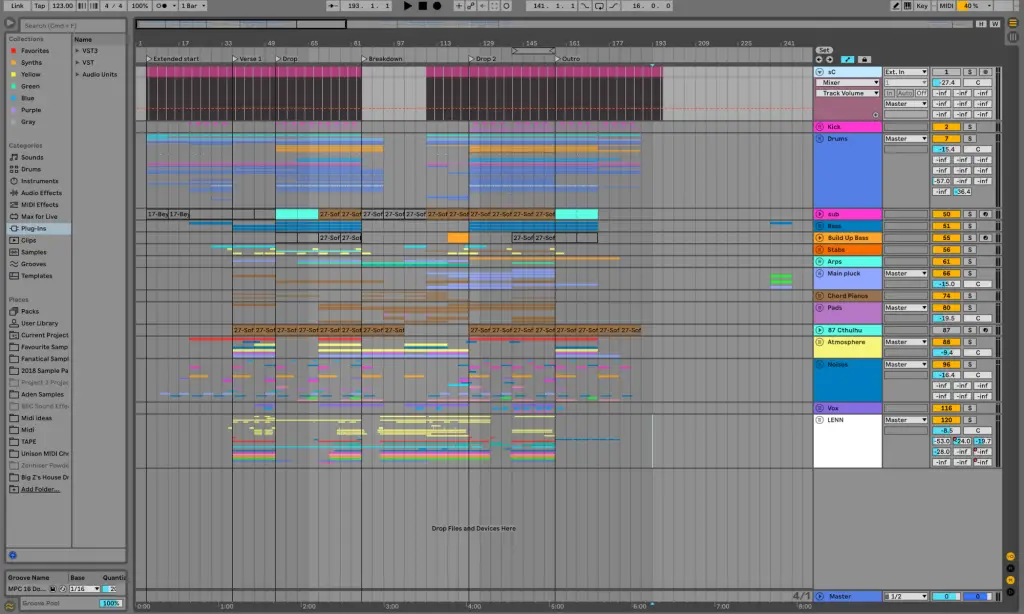
About the bass notes midi, it is playing a typical 16th dotted note bass rhythm.
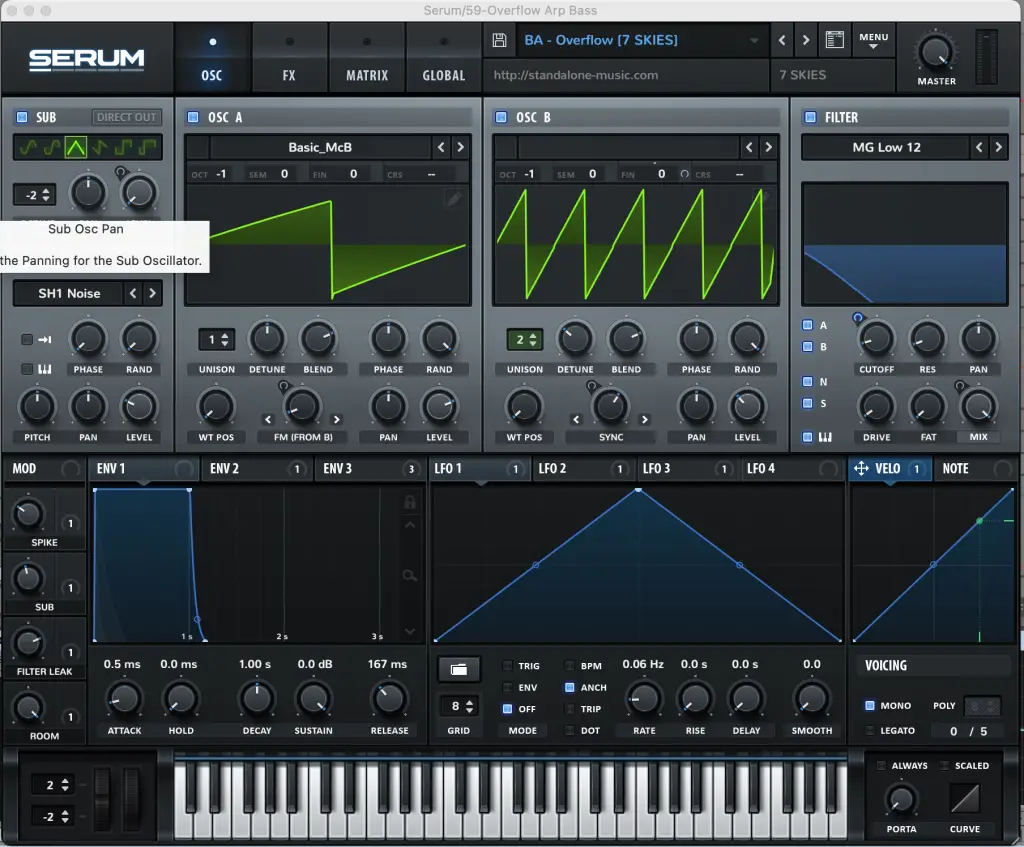
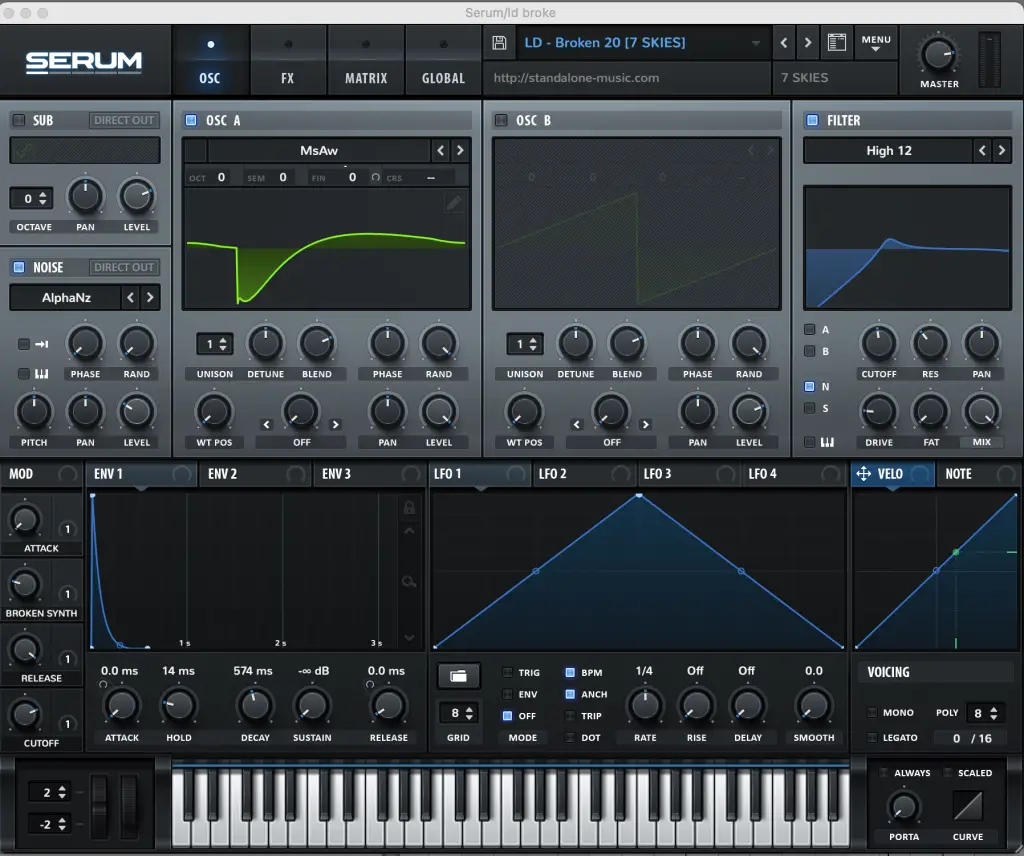
To layer the bass, I have opted for a preset from the 7 Skies pack, to provide that top and higher frequency bass layer to allow the bass to pierce through the mix. In terms of frequency range, the general listener on their iPhones or standard speakers won’t hear frequencies less than <100hz so it>
As you can see, this bass comprises of a sawtooth and triangle wave on the oscillators, which naturally provide more attack on the bass notes whenever they are played. I have assigned LFO 1 to the filter cut-off and also the B Warp of the Osc B to provide some more movement to the outputted sound. With 5 permutations of the triangle wave on Osc B, it provides some additional harmonics to this high-end bass sound, providing more natural width. Again, I am automating the envelope to the cutoff filter in conjunction to the progression of the track.
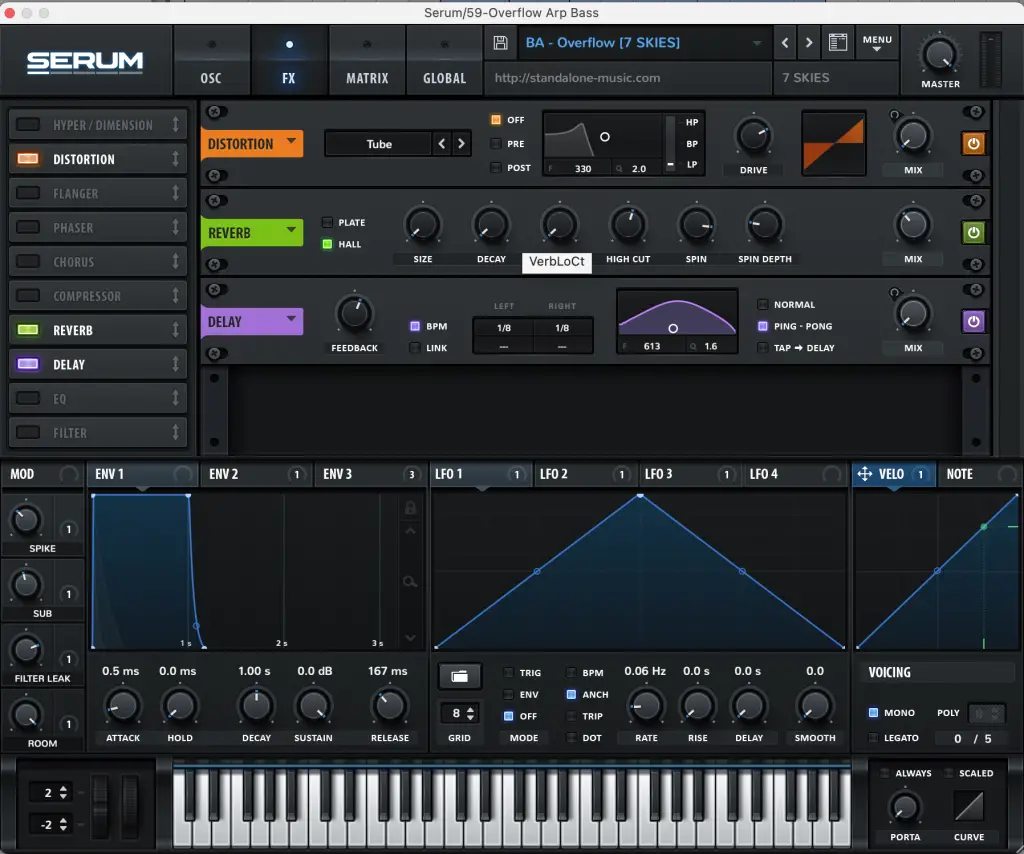
In the FX tab, I have added some distortion via a tube input, with a low pass filter, to cut off the unnecessary high-end static, which usually comes with distorting sounds.
Additional processing used for this sound, usually involves Sound Toys ‘Decapitator’, and/or Waves RBass which both really help in creating the saturation needed for the bass to come alive. Of course, EQing plays a major role, and as mentioned, I usually carve out the bass layers per each frequency range to ensure no phasing or masking is occurring.
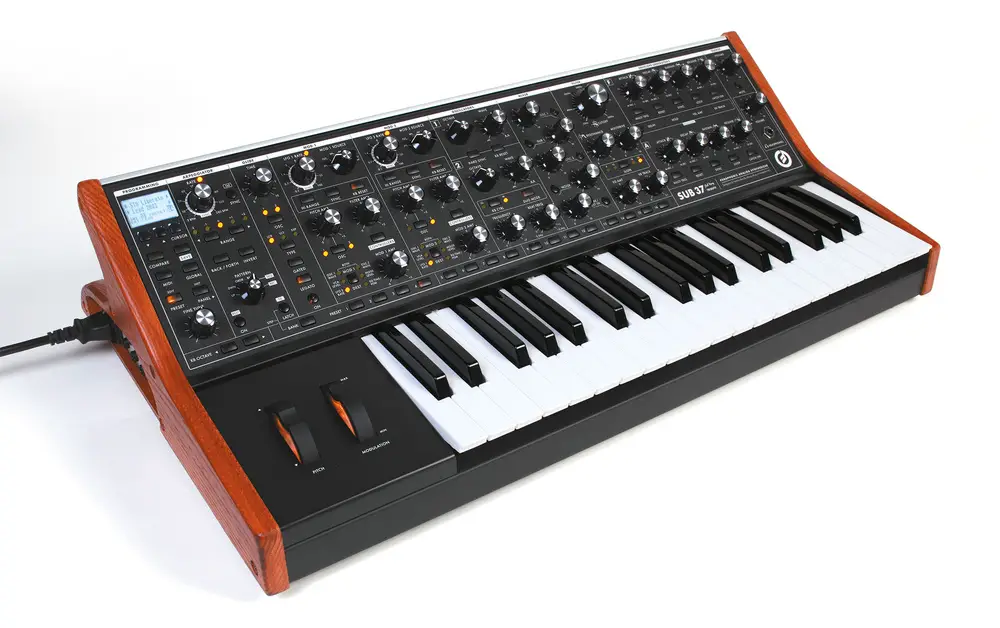
The opportunities with Serum are honestly endless for a digital piece of software. Of course, you will not be able to replicate the rich harmonics and prominence compared to your analog hardware, but it comes pretty close. I usually layer my sounds with a combination of Analog gear too, such as the Prophet 6 and also the Moog Sub-37, in this instance I have used the Sub-37 to play the sub bass of around the 50-80hz range.
The sub-37 is a widely used synthesizer in electronic music, so there shouldn’t be any introductions here. I’ve learnt over the year using it, don’t go overboard with it, and establish a clear purpose before diving into the synth.
If you want to create a foundational bass sound, you don’t need to go crazy, keep it simple, start off with the foundations of the sound and then slowly add some additional filters. I’ve also found that having a held sublayer underneath dotted rhythm bass, whether in conjunction or on the offbeat, can provide a fuller sound to your basses and produce a much thicker sounding bass once everything has been glued together, so try that for the next time.
Ableton Operator
The pluck sound in the final drop encompasses a few layers. In this genre of music, I usually approach my plucks in a 3-stage approach. First, I want to create the body of the sound, focusing predominantly between the 500-3000 hz range. For the body of the pluck, I decided to go with a simple sawtooth wave-based pluck in Serum – using the basic analog wavetable preset from Serum with adjusted wave positions between Osc A and Osc B.
The envelope for the pluck should usually have low to no hold, a fast attack, some slight decay, and minimal sustain. By mapping this envelope to the cutoff, you can quickly achieve the foundation of the progressive house sound. This genre relies significantly on automation to continue to entertain and perk the listener’s interest.
I would then usually find a pluck that has an even stronger attack and hits the higher frequencies above the 5000hz range. My main objective with this layer, is to ensure that the higher frequencies are punching through for the track, to ensure it is heard on all sound systems.
In this instance, I have found another pluck in Serum to ascertain this frequency range. I have also slightly automated this pluck’s panning to provide some more width to the sound. I also use a transient shaper, with a very slight increase in the attack to accentuate the pluck here. In addition to this, I have a pluck from Ableton’s operator suite, which aims to provide more width to the plucks through the use of some Haas delay along with Valhalla shimmer to put it further behind the main sounds.
For this track, I have automated the noise attack and reverb of the Ocean pluck as well as adding a resonator to make the sound more metallic.

For the last layer, I usually find a noise or perc sample that plays the same melody as the pluck. This sound should be rather subtle in the background, so ensure you lower the volume on the fader to ensure it is subtly audible.
The idea behind this layer is quite simple, the added texture of these sounds can build the tension of the sound more, particularly in the build-up and the drops. In this track, I’ve just used Operator from Ableton, selecting the white noise option and automated the decay time – increasing it for more tension/decreasing it for less.
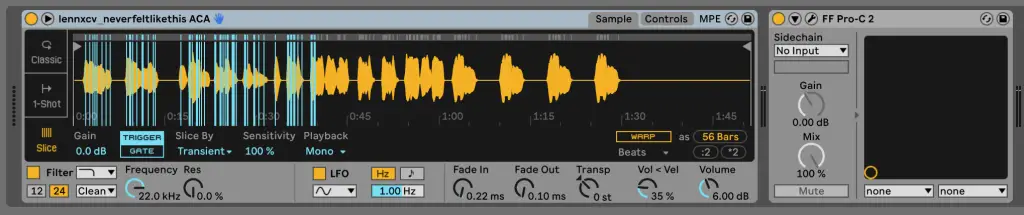
I would then usually group all these plucks together and apply some additional processing on this group. I usually add a glue compressor or a compressor to mesh the sounds together, along with some multiband compression to bring out particular ranges that I want the pluck to follow. Additionally, I usually sidechain this group to frequencies that are usually fighting in the same frequency, and in this instance, for ‘Never Felt Like This,’ I have side-chained this to the vocal so that the pluck is ducking ever so slightly when the vocal is playing.
Vocals – Lenn
First of all, a big shout out to both Ellen and Alex. They did an amazing job with the vocals and made my job pretty easy when it came to mixing them in with the rest of the music.
Usually with vocals, I approach them in a pretty structured manner. I usually have a dry lead vocal with multiple layers of doubles, harmonies, adlibs and vocal chops. Each of these has a role to play in building up to the big hook.
First, I have the Dry lead with multiple snippets of multiple takes that form this. This is usually dead center in my track to ensure the lead is heard prominently regardless of where the music is played. I usually request for as many takes as I can from the vocalist, I enjoy having the flexibility of choosing the best segments of each take. This becomes a time-consuming process, reviewing 10-15 takes and forming one lead from this, but it’s worth it! Further, I look to remove any unnecessary background noise such as big breaths or harsh sibilance sounds to polish up the lead. To remove big breaths, I usually listen through the vocal and identify the areas where the breath is too loud, and I individualise these and reduce the volume on these so they appear smoother and more natural.
I usually use a combination of Fab Filter’s DS and Soothe for harsh sibilance.
I then add some doubles along with some harmonies that Lenn sang, which you can hear in the breakdown. She was also kind enough to sing different takes of the main hook, “I Never Felt Like This which I used as part of the buildup. The doubles I usually add some processing such as delays, frequency pitching using either an autotuner or melodyne and I usually pan each double one hard left and right, to increase the thickness of the vocal.
In addition to this, if you listen carefully, I have also sampled her vocals and divided them into vocal chops to add tension to the build-up – all I did was drag the lead vocals into Ableton’s sampler and played around on the keyboard until I discovered a melody I liked.

I then usually have a WET vocal layer, which contains ½ echo delay along with some reverb and eqing to make the vocal more ‘3 dimensional’. Soothe is also a great plugin, for removing any harsh frequencies, I have been using this over sharp EQ cuts the past couple of years, since Soothe is addressing the harsh frequencies dynamically rather than statically on a particular frequency which may cut out some wanted frequencies in different areas of the track.
Arts Acoustic Reverb
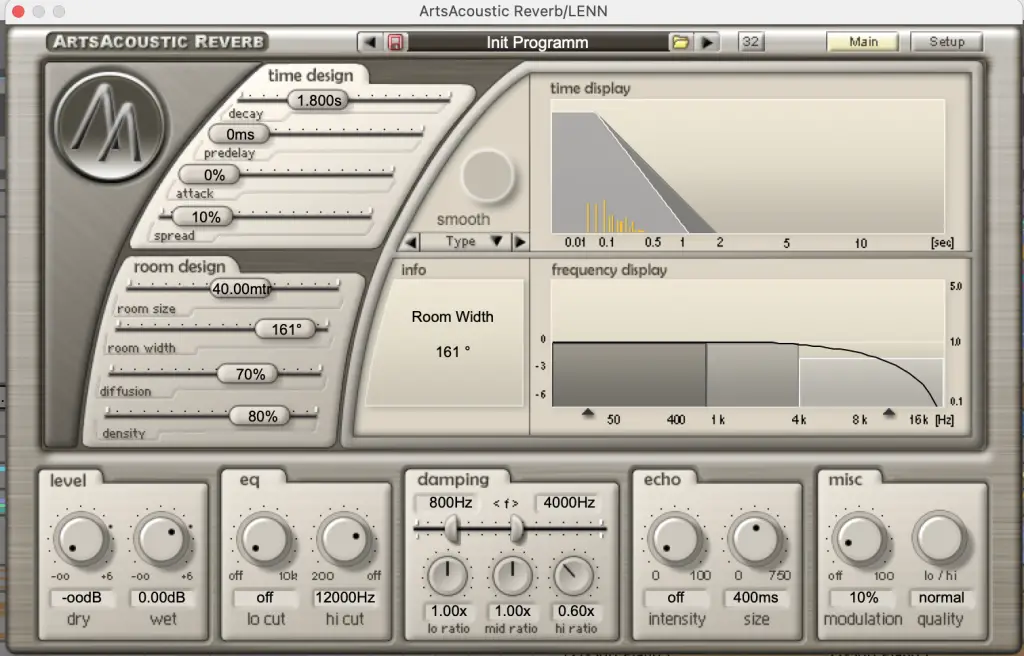
The Arts Acoustic Reverb is what I primarily use when it comes to creating a space for all my instruments and a sense of depth between my instruments. I also use Valhalla’s suite of reverbs which are pretty widely used. I usually enjoy using different reverbs for different instruments I have. I usually use the Arts Acoustic Reverb for my vocals and synths, I really like the space and sound that it places the vocals in. It’s been around for ages and there are probably much better reverb plugins out there now, but again I feel comfortable using it.
One thing I love in particular with this reverb is the ability to adjust the damping settings, allowing me to control an additional dimension of the reverb, depending on how ‘springy’ I want the reverb to behave – I usually use have the mid and hi ratio set between 0.4-0.8 for my vocals and within a restricted frequency range (usually around 2/3000-6000hz). Additionally, I also adjust the room size and width accordingly, which I find is essential when it comes to creating a sense of separation in your mixes. Depending on what instrument I am placing this reverb on, I try and make conscious yet subtle differentiations to the reverb size for my instruments – for example, in Never Felt Like
This, I would place all atmospheric elements such as FX, ad-libs, pads and strings in a much bigger room setting, compared to more prominent instruments such as my piano or lead. Again, this is automated, so in the build-up, I usually increase the wet signal before the drop to provide that washing-out effect before all the elements come together for the final drop.
Ableton Utility
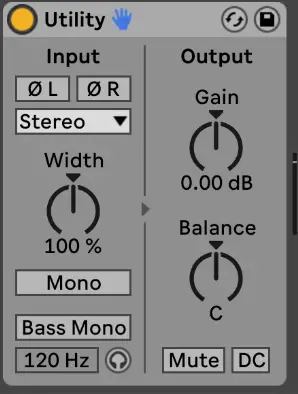
This may come as a surprise to you, but I use the Utility plugin in ableton quite prominently when I’m creating and mixing– it can be used so many differing aspects in my creation and mixing process. Whilst most producers will see this as simply a volume gain/lower knob there are so many functions it can perform.
For example, on my bass group, I would usually use the bass mono section to ensure that frequencies below 100hz, for example, are in mono. Further, creating automation on the volume and the width of the music before the drop is such a subtle thing to do, but is so necessary to create make the drops have a bigger impact. For volume, I usually don’t go further than -2.db, and for width, I try to stick above the 60% range.
When I’m mixing, I also usually place a utility tool on the master chain of my track. By key mapping the mono function in the utility tool via Command K and selecting a key (on mac), I can easily switch my mix between stereo and mono when performing the mixdowns on my tracks. I can listen to the track in mono now, and make key mixing decisions based off this simple trick in a fast manner.
Again, these little shortcuts really help when you’re spending hundreds of hours mixing and creating.
Trackspacer
I use Trackspacer and Fab Filter Pro Q-3 interchangeably when trying to carve out space for each element in my tracks. Of course, you must ensure you select the right sounds that complement each other first, before you look into EQing each of these to place them in the mix.
A handy tip I’ve learnt regarding EQ is Reduction > Addition. Reduce the frequencies in another instrument to let another one shine, rather than trying to make both fit by boosting the frequencies! Re track-spacer is more so an additional method to sidechain frequencies within the same range – I usually do this gently interchangeably with plucks, vocals, and pads and synths. Below is a sample of how you can carve out the frequencies by honing in on the range you want to give way for the sidechain audio input. I find anything between 5-15% is a good range, anything above sounds rather unnatural.
This can also be done in a similar way with Fab Filter Pro -Q3, just remember that in Ableton, the sidechain function is selectable in the audio rack below, rather than inside the plugin itself.
Learn More About This Synth Here
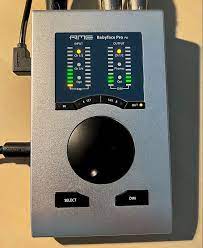
My Hardware
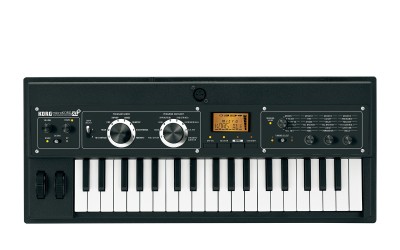
I have just moved abroad and not at my studio back home in Australia, so I have just obtained photos of the hardware in my studio. The BabyFace Pro has been a great little audio interface for me, the low latency response times, strong pre-amp settings along with the audio quality translated from my analog synthesizers have been quite significant compared to my old Steinberg UR44. As mentioned previously, I have a Sub-37, which I use quite often for my bass sounds. I also have a little MicroKorg XL+ 37 keyboard synthesizer which is handy when I’m travelling on the road.
Quick Fire Tips For Making Progressive House
Tip # 1 – Less is more – Do you need that extra synth? Is it causing constructive interference and phasing issues? Can you hear the sound at low volumes? If yes, remove it, 9/10 times you won’t need it and it will give your mix room to breathe. I have seen walkthroughs of completed tracks where there are only 14 tracks – so
Tip # 2 –Counter your melodies – these elevate a track to the next level, I always like to think of the need for a call and response.
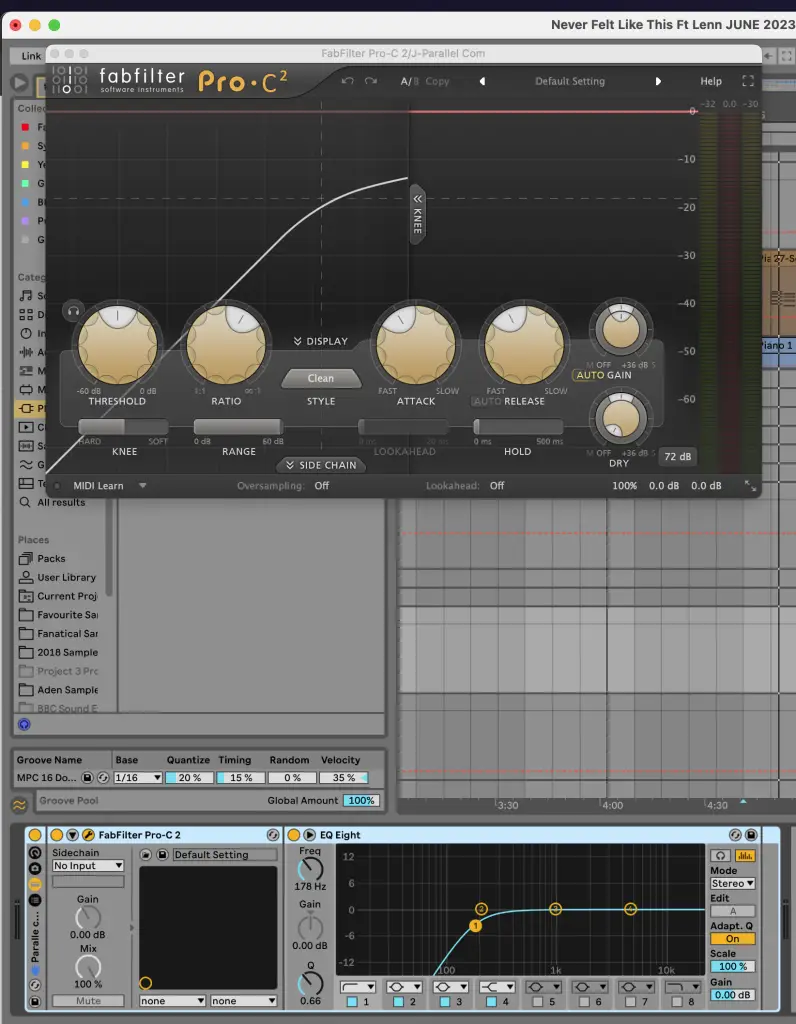
Tip # 3 – Parallel Compression is wonderful…. but don’t overdo it!
I usually set up a return channel using Ableton with a heavy compressor setting and a high-pass EQ. I have found over the years that per tip # 1, to use parallel compression sparingly. I mainly use it on my music and vocal buses to bring them more into the mix
Tip # 4 – Bus Bus Bus – Send your channels to a bus, it provides a lot more flexibility in molding all your sounds together.
The post How It Was Made: Kaiyan – Never Felt Like This (Colorize) appeared first on Magnetic Magazine.