Hailing from the vibrant dance music hub of Las Vegas, Nevada, beat.pacific is a dynamic producer renowned for his captivating compositions in progressive, deep, and melodic house music. With a deep-rooted passion for music that echoes through every beat, beat.pacific draws inspiration from his personal experiences, including cherished moments with his wife and their four dogs, as well as his role as a mentor to up-and-coming producers.
Influenced by icons such as Estevia, Miss Monique, and Paul Oakenfold, beat.pacific’s sound is distinguished by its rich melodies and evocative vocal elements, elevating the listener on a journey through euphoric rhythms and soulful harmonies.
“See The Sun,” beat.pacific’s latest release signed by Play Records, embodies his signature style, blending atmospheric textures with pulsating rhythms that evoke both introspection and elation.
With the track out now, we dive deeper into the production process of this electronic gem.
Xfer’s Serum
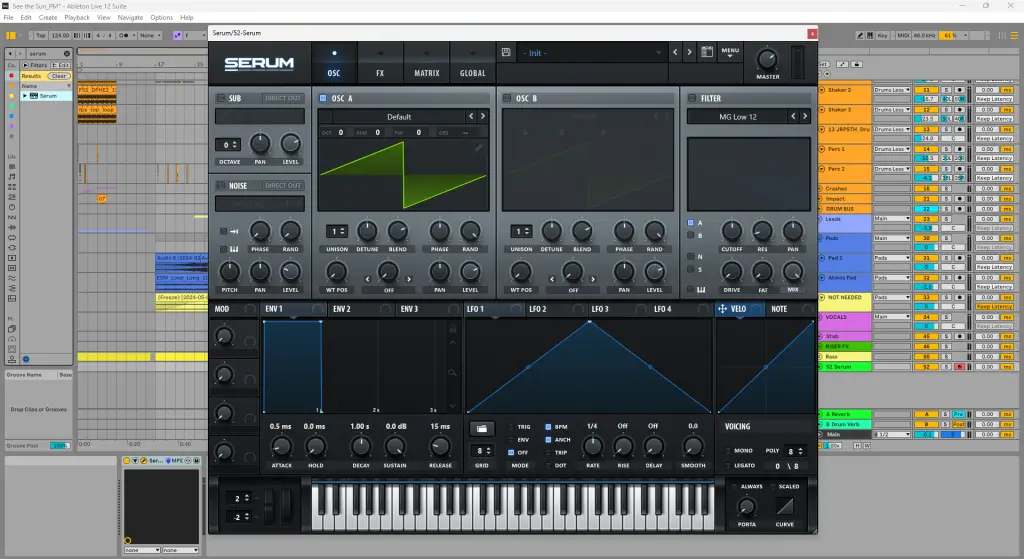
Serum is a powerful VST synth that’s a favorite among producers for its versatility and pristine sound quality. It features a user-friendly interface with an advanced wavetable engine, allowing you to craft complex and dynamic sounds from scratch or tweak its extensive library of presets. Whether you’re shaping lush pads, gritty basslines, or intricate leads, Serum’s intuitive design and robust modulation capabilities make it a go-to tool for bringing your creative ideas to life. Plus, its visual feedback and high-quality filters help you fine-tune every detail with precision.
In my track See The Sun, Serum played a key role in shaping the bassline, which became the foundation of the entire piece. I started with the FSS_SMHE2_Bass_Scratch preset, a quality pluck-type sound that provided a solid base. From there, I tailored the preset to fit the specific vibe of the track, adjusting the parameters to achieve the desired tone. To add some movement and life to the bassline, I used an auto-filter, which gave it a dynamic quality that helped drive the energy of the track.
For producers diving into progressive house, Serum is a must-have synth for creating everything from lush atmospheres to punchy basslines. Start by exploring YouTube courses like “Serum Beginner Guide” by ADSR Music or “Serum Tutorial for Beginners” by Zen World to get a solid grasp on sound design. To speed up your workflow, remember that holding Shift while adjusting parameters allows for fine-tuning, and pressing Ctrl+Shift+Click (or Cmd+Shift+Click on Mac) quickly initializes a new patch, keeping your creative process smooth and efficient.
FabFilter’s Pro-Q3
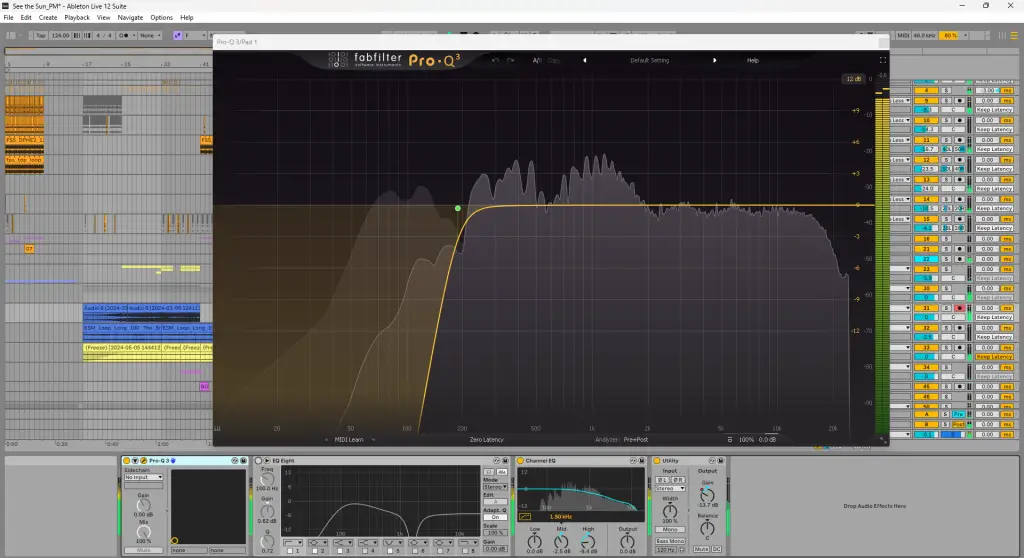
FabFilter Pro-Q3 is an incredibly versatile EQ plugin that’s become a staple in many producers’ toolkits. It’s known for its intuitive interface and powerful features, like dynamic EQ, which allows you to target and control specific frequencies with precision. Whether you’re looking to clean up a mix, shape the tone of individual instruments, or create space between elements, Pro-Q3 makes it easy with its real-time spectrum analyzer and intelligent solo mode. It’s a go-to tool for anyone serious about getting their mix just right.
In See The Sun, FabFilter Pro-Q3 was a key tool in shaping the sound. It’s a standard plugin in my tracks, and I used it to automate high and low pass sweeps, similar to how I used the auto-filter, adding movement and depth. Pro-Q3 also came in handy for notch filtering, helping me knock out any unwanted resonant sounds that could clutter the mix. It’s a versatile tool that really lets you fine-tune every detail.
If you’re producing progressive house, FabFilter Pro-Q3 is a fantastic tool for getting your mix to sound just right. It’s perfect for dialing in EQ adjustments, tackling tricky frequencies, and adding some dynamic control. For a great start, check out YouTube tutorials like “FabFilter Pro-Q3 Tutorial” by MixbusTV or “Pro-Q3 EQ Masterclass” by In The Mix—they break things down in an easy-to-follow way. And to make your workflow smoother, try using Ctrl+Shift+Click (or Cmd+Shift+Click on Mac) to quickly add a new EQ band, and double-click any band to solo it, so you can tweak with precision.
Ozone Imager
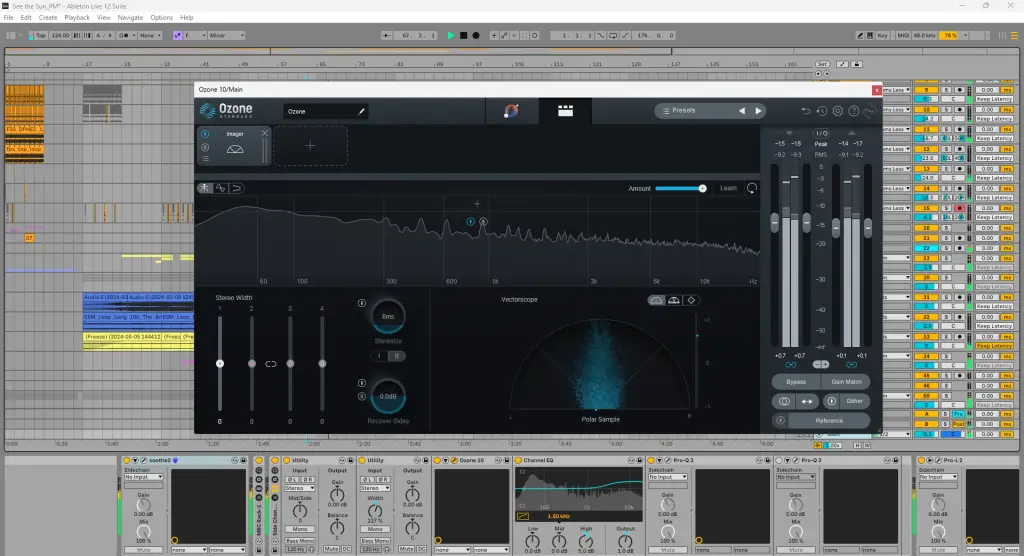
The Ozone Imager is a super handy VST plugin that helps you shape the stereo image of your tracks. Whether you want to widen up your mix for a bigger, more spacious sound, or tighten things up to focus the energy, Ozone Imager has got you covered. It’s perfect for adding that extra depth and width to your tracks without messing up your balance. Plus, it’s really easy to use—just a few tweaks, and you can instantly hear the difference in your mix!P
In my track “See The Sun,” I used the Ozone Imager to shape the stereo sound and make the mix feel more expansive and immersive. By widening certain elements, like the synths and effects, I created a fuller, more spacious sound that really helps the track breathe. The stereo imaging adds depth to the mix, making it feel more dynamic and alive, which is essential for that rich, full-bodied progressive house vibe. It’s all about giving each element its own space while keeping the overall mix balanced and powerful.
For progressive house producers, using Ozone Imager can really take your mixes to the next level by making them sound full and more professional. By widening key elements like synths and pads, you can create a spacious, immersive sound that fills up the stereo field beautifully. It’s like giving your track a nice stretch—without the yoga mat! Just remember to keep everything balanced so that your mix doesn’t lose its punch, and you’ll have that polished, pro sound in no time.
Soothe 2
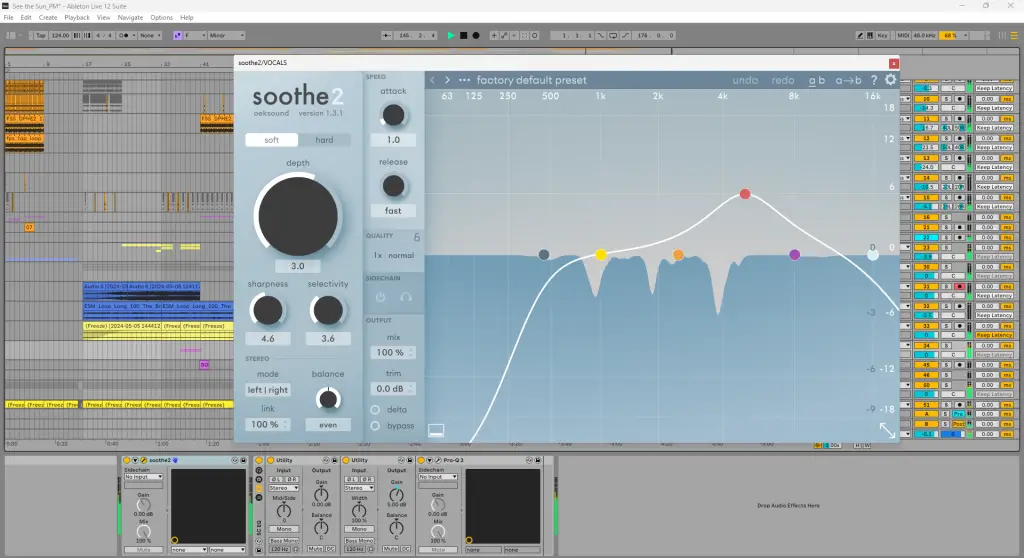
Soothe 2 is a lifesaver when it comes to taming harsh frequencies, especially in vocal tracks. It’s like having an automatic EQ that intelligently targets and reduces those pesky resonances without killing the natural tone of the voice. Whether you’re dealing with sibilance or harshness, Soothe 2 smooths things out effortlessly, making your vocals sound polished and clear. It’s perfect for keeping your mix clean and your vocals front and center without a lot of fuss. I use a lot of vocal samples in my tracks so this is a must have plugin.
When I was working on “See The Sun,” I used Soothe 2 to smooth out some harsh frequencies in the vocal sample. There were a few spots where the vocals were a bit too sharp, so I dialed in Soothe 2 to gently tame those peaks without losing the warmth and clarity I wanted. It made the vocals sit perfectly in the mix, giving the track that polished, clean feel. It was like a magic touch to keep everything balanced and smooth
If you’re producing progressive house, Soothe 2 can be a game-changer for vocal processing. It’s great for smoothing out harsh frequencies and taming those pesky resonances, giving your vocals a polished, professional sound. For a starting point, try using the “Lead Vocal” or “Sibilance Control” presets—they’re super helpful, and you can tweak them to fit your mix perfectly.
If you’re new to Soothe 2, I’d recommend checking out “Soothe 2 in 10 Minutes – Vocal Processing Tips” by In The Mix or “Soothe 2 Basics and Best Practices” by Production Music Live on YouTube. They’re perfect for getting up to speed!
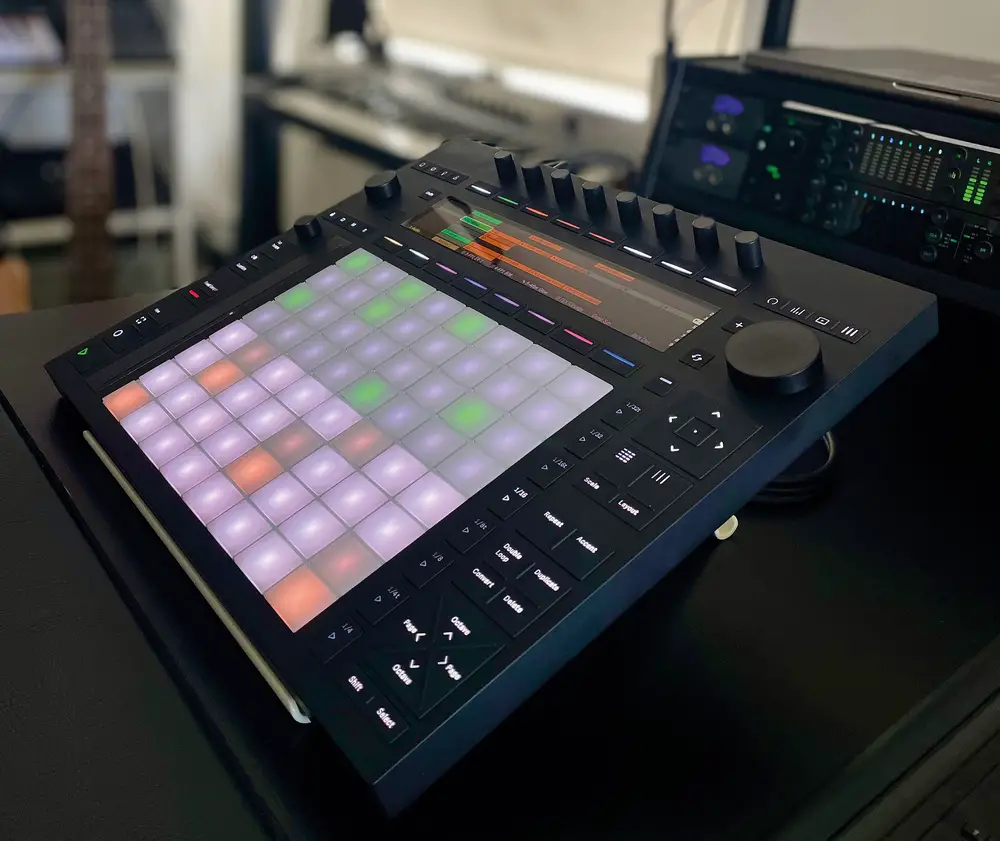
Ableton Push 3
The Ableton Push 3 is a serious upgrade for music producers, especially with its more technical features. It comes with an MPE (MIDI Polyphonic Expression) enabled pad grid, allowing for more dynamic and expressive performances, like bending notes and adding subtle vibrato with just the pressure of your fingers. Push 3 also has a built-in audio interface with two inputs and outputs, so you can connect your instruments or mics directly. It supports standalone operation, thanks to its internal processor and storage, letting you create and perform without needing your computer at all. Plus, with the new customizable layout and scale modes, you can tailor the workflow to fit your style perfectly.
When I was writing See The Sun I was in the middle of moving my studio around in my house. The standalone ability with the Push allows to me write ideas while sitting on the couch with the dogs or enjoying some morning coffee outside in the garden. I can take it anywhere and then come back to load the idea into the DAW in the studio and continue working.
When I’m working on new ideas, the Push 3 is my go-to tool. It lets me quickly sketch out melodies and beats on the fly, so I can spend more time developing the idea as it comes to me. I love that I can just dive into the creative process without any interruptions. Plus, in the studio, it’s my main MIDI controller, making it super easy to control everything right from the Push 3.
Having a MIDI controller with a standalone option, like the Push 3, can be a game-changer for producers. It lets you create and experiment with ideas without needing your computer, which is awesome for those moments when inspiration strikes, whether you’re in the studio or on the go. Plus, it integrates seamlessly into live performances, giving you the flexibility to control your entire setup and improvise on the spot. It’s like having a mini studio that’s always ready to go, whether you’re writing, recording, or performing live.
See The Sun is out now on Play Records
The post How It Was Made: beat.pacific – See The Sun appeared first on Magnetic Magazine.