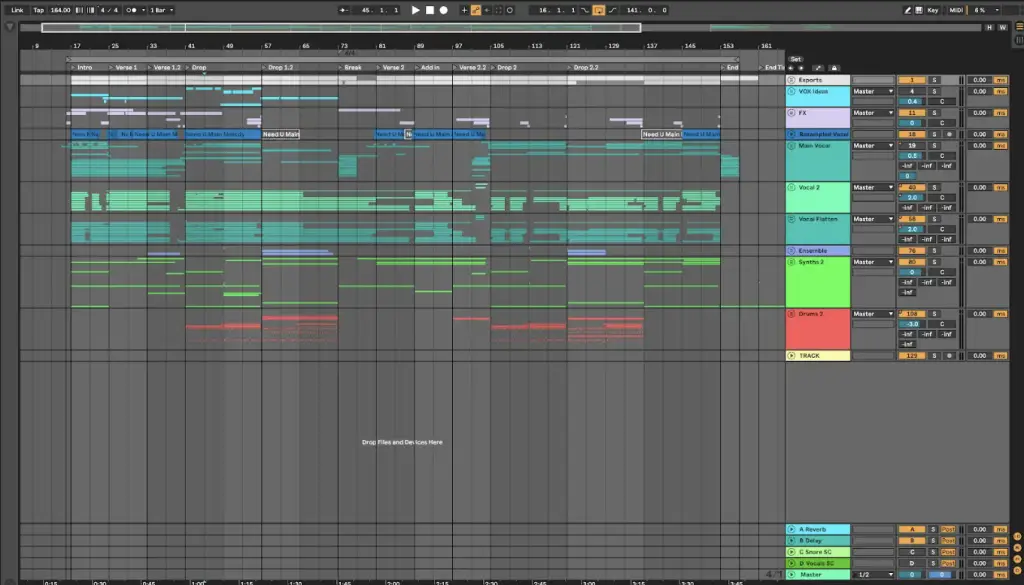
Lately, Reese basslines have dominated the low-end sound with their intense, churning energy. They’re so popular now that it takes exceptional skill to make them stand out. MOONBOY excels at this, especially with his track “Need U,” which dropped about a year ago.
Despite its slightly older release, this track showcases how to maximize the potential of a Reese bassline and create a truly lifelike atmosphere that draws you into the song’s world. We’re excited to have MOONBOY on to discuss his approach to Reese basslines, his synths and processing techniques, and other studio tricks behind “Need U,” which has already racked up seven and a half million streams.
Listen to “Need U” below to familiarize yourself before we dive into the details of its production.

SERUM

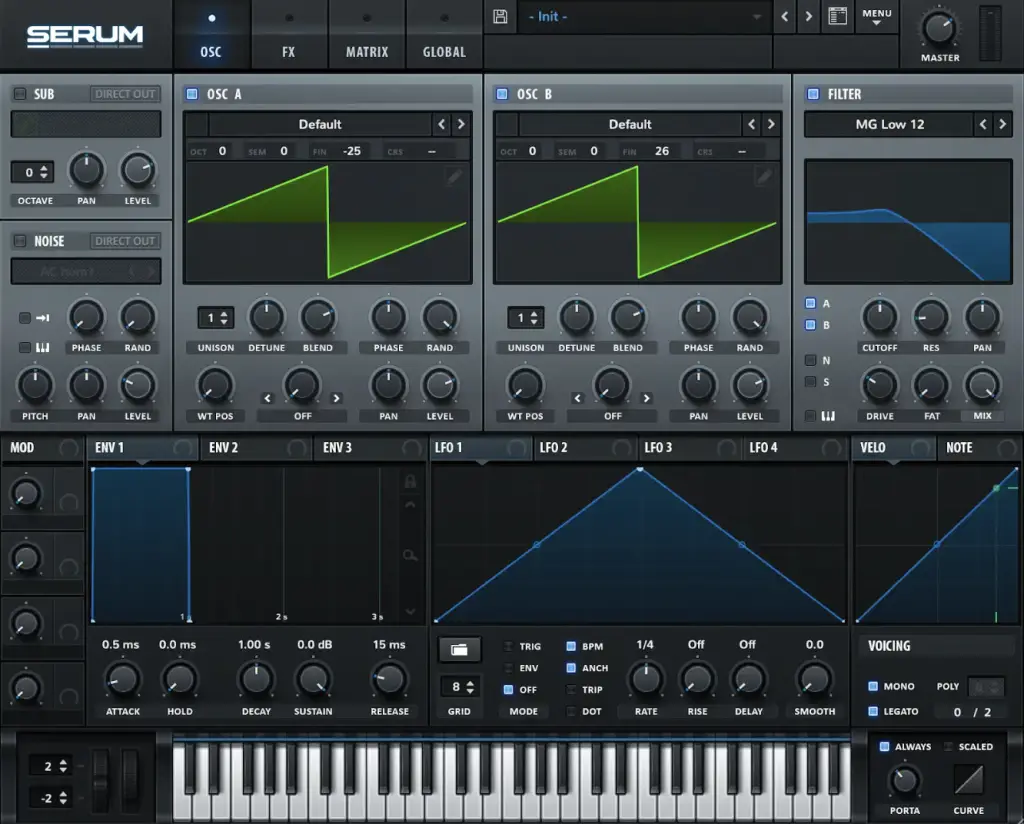
In the creation of “Need You,” I extensively used Serum by XFER Records, a powerful and versatile wavetable synthesizer. Serum stands out due to its high-quality sound and visually intuitive interface, which allows for deep manipulation of wavetables and an extensive range of modulation possibilities, perfect for crafting unique sounds.
For “Need You,” I leaned heavily on Serum for its capability to produce rich and complex textures. Specifically, I created pads and basses to fit the smooth and fluid vibe characteristic of liquid drum and bass. I manipulated the wavetables and applied a variety of effects within Serum, such as reverb and delay, to enhance the atmospheric depth of the track.
Serum is an excellent tool for producers delving into liquid drum and bass. Its broad range of wavetables and deep modulation options allow for the creation of lush pads and deep basses that are staples of the genre. Experimenting with its filters and effects can help in crafting those signature ethereal and immersive sounds that define liquid drum and bass.
ANTARES AUTO-TUNE
Another cornerstone of the production was the use of various vocal processing techniques, particularly through plugins like Antares Auto-Tune and various vocal effects to achieve the polished, seamless vocal chops heard in the track. Pitch correction is the secret sauce to guarantee that everything sounds harmonically pleasant while adding unique textures to vocals!
I matched the autotune to the same key as my track, which is E minor. I also made sure to leave it on “Formant” mode, which I typically find to be more natural sounding than the “Classic” mode. Making sure it sounds natural before routing it through my reverb will guarantee that organic vibe I was looking for! I had the retune speed at 18 which felt like a nice sweet spot for the vocals to snap to while maintaining that organic vibe.
For producers interested in liquid drum and bass, mastering the art of vocal processing can be a game-changer. Using pitch correction tools to refine vocal samples and giving it a unique character can give your tracks a slight edge. Since vocals are arguably the most important part of a song, honing in on them will psychologically and scientifically make your track more addicting for your listeners!
VALHALLA ROOM

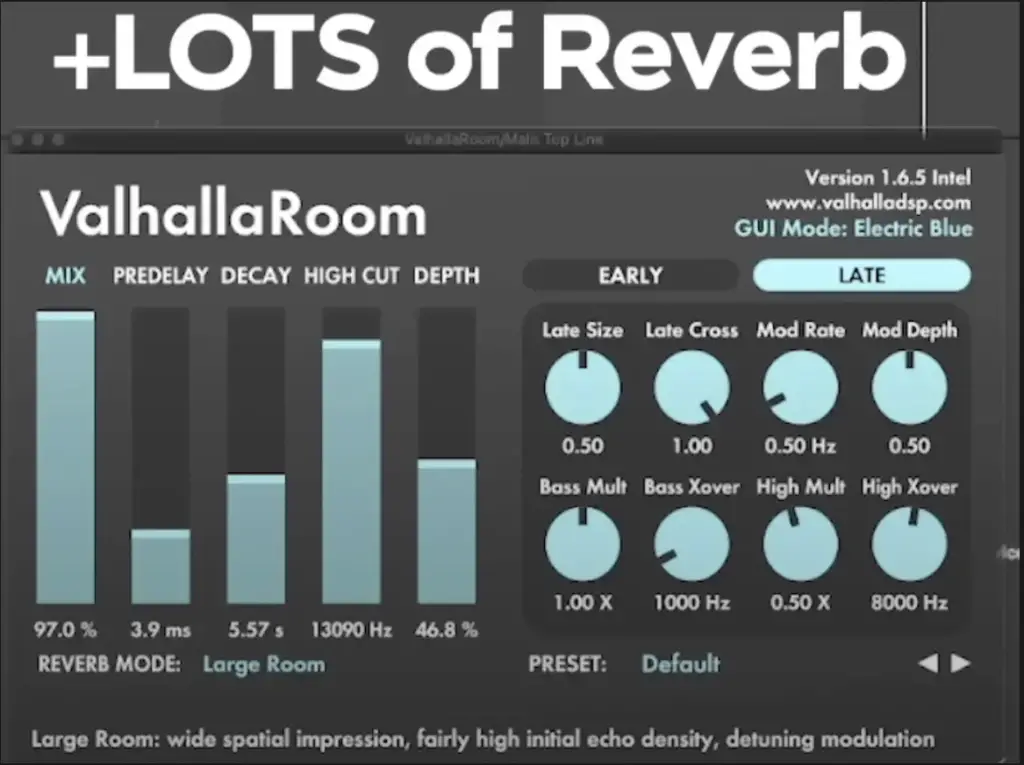
ValhallaRoom is my go-to reverb plugin. Everything about it just sounds so nice, the depth of the reverb is really rich, and it gives me a lot of control over the most important parameters. The user-friendly interface makes it very easy to slap on and use right off the bat!
In “Need You,” I processed vocal samples with a heavy dose of reverb to turn it into what is basically a pad. I made sure to completely wash it out by setting the mix to 100%. That way, it pleasantly fills up the space in the drop while transforming the vocal to sound unique. This step was crucial to getting the sound just right before running it through the next plugin. It not only enhances the vocals’ presence in the mix but also aligns them perfectly with the liquid aesthetic of softness and flow.
Using reverb is perfect when you’re looking to fill up space and give your tracks a nice floaty vibe. But be careful not to overdo it because it’s hard to get your mix to sound good when you have too many elements going on. Use it to focus in on your main melodic elements like vocals or pads to give your tracks bring your tracks to life with a nice atmosphere!
AUTO PAN

Auto Pan is a quick and easy-to-use Ableton stock plugin that allows you to easily give your sounds some really cool movement! It can be used to “wobble” the volume to replicate an LFO or tremolo effect. I love using this plugin to give my tracks a nice rhythm to make it feel more engaging!
In “Need U”, I use Auto Pan as a tremolo that has a bit more complexity than your usual LFO. I automated 3 parameters: among, rate, and phase. I drew the automation to match the phrasing of the vocals and the drop structure. By simultaneously modulating these parameters, it gives the drop a really unique feel and makes it super engaging!
I like to think of the Auto Pan parameters as Serum FX Macros. You can completely transform a sound just by automating 3 knobs. Even though you might not know what it’s gonna sound like, by simply tweaking these knobs, it will almost always give you some much needed inspiration to finish up your idea!
Quick Fire Tips For Making This Genre
Tip #1: Start with the drums; they’re the foundation. Aim for a tempo between 160-175 BPM. Use ghost snares and break loops to add complexity and texture.
Tip #2: Focus on the vibe. Mix vocal chops, synth pads, and chords. Remember, it’s all about creating an atmospheric, immersive experience.
Tip #3: Bass layers are crucial—use deep, organic basses like Reese, drones, and pads to underpin the track. Experiment with slightly detuned oscillators for a richer sound.
Tip #4: Keep your mix clean. High-pass filters are your friends, especially on non-bass elements to prevent muddiness in the low end.
Tip #5: Automation is key. Automating effects like reverb and volume can greatly enhance the dynamic feel of your track, keeping the listener engaged throughout.
The post How It’s Made: MOONBOY – Need U appeared first on Magnetic Magazine.


