Table of Contents
Mastering music is easier than ever, and it’s still a key step to make sure your tracks sound great on any system. Tools like Ozone 11 make it super approachable, but they also give you room to get creative if you want to go deeper. Yeah, the presets and AI Mastering Assistant are a solid starting point—they’ll get the job done. But the real fun starts when you move beyond the defaults.
Ozone 11 has a ton of underrated features that even beginners can use to make their masters feel polished and unique, even without decades of experience in the studio mastering Hollywood or Major-label-level productions. It’s built to give you great results fast, but it also encourages you to explore. Starting with presets is fine, and the AI assistant works well, but once you start digging into the less obvious tools, that’s where you can really make your masters stand out and match your sound perfectly.
Using the Clarity Module
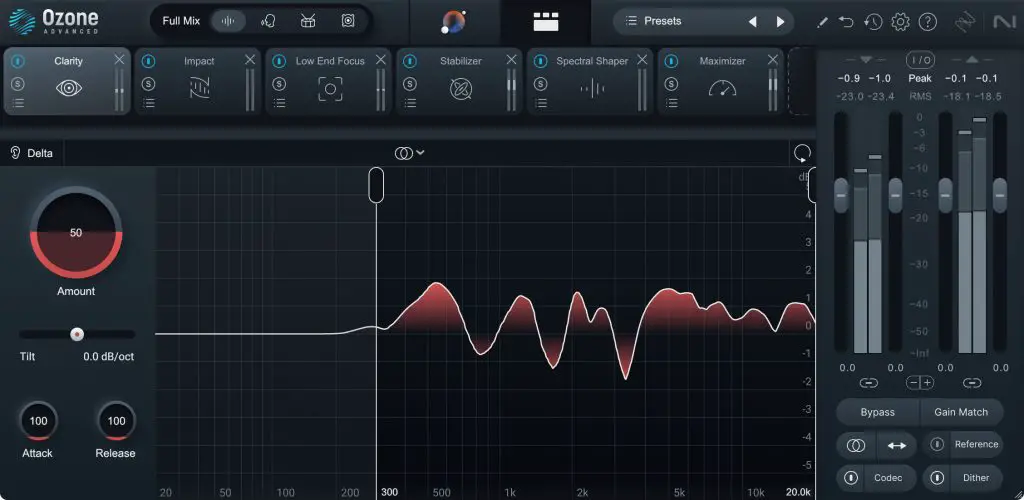
The Clarity module in Ozone 11 takes tonal balance to a new level, which says a lot for anyone whose been reading our site for a while and knows how much I love Tonal Balance. It offers a way more dynamic and precise approach than traditional EQ which opens up a ton more flexibility as well. Instead of relying on broad sweeps, it splits the signal into hundreds of spectral bands, making smooth and natural adjustments. It’s like having an EQ that listens to your track and adapts in real-time. The result? A polished, balanced sound without that over-processed vibe that often leads to overly-sterile or unbalanced mixes.
One of the coolest features is the tonal tilt control and is definitely one of those sneaky features that far too many of you out there are overlooking, which lets you adjust brightness or darkness by referencing different noise profiles—pink, white, or brown. For example, if your mix feels too bright, tilting it toward brown noise adds warmth and depth. On transient-heavy tracks, tweaking the attack and release settings gives you even more control over how the module responds.
Here’s a quick tip: Start by isolating trouble spots. If something feels off, like harsh highs or muddy mids, make small adjustments and keep bypassing the module to make sure it’s improving the mix, not overpowering it. Pairing Clarity with some subtle EQ tweaks can be a game-changer for tightening up your tonal balance.
Why Stabilizer is the Unsung Hero of Your Mastering Chain
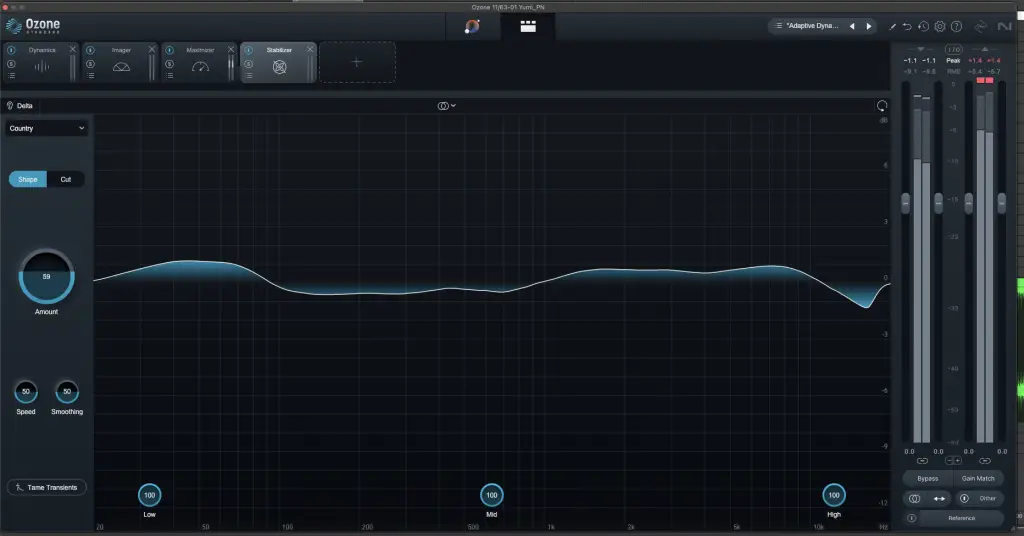
The Stabilizer module in Ozone 11 is one of those features that might fly under the radar but can totally save your mix. It’s like a dynamic EQ that works in real-time, smoothing out harshness or muddiness without feeling heavy-handed. The way it adapts to your track makes the adjustments feel natural and musical, which is exactly what you want.
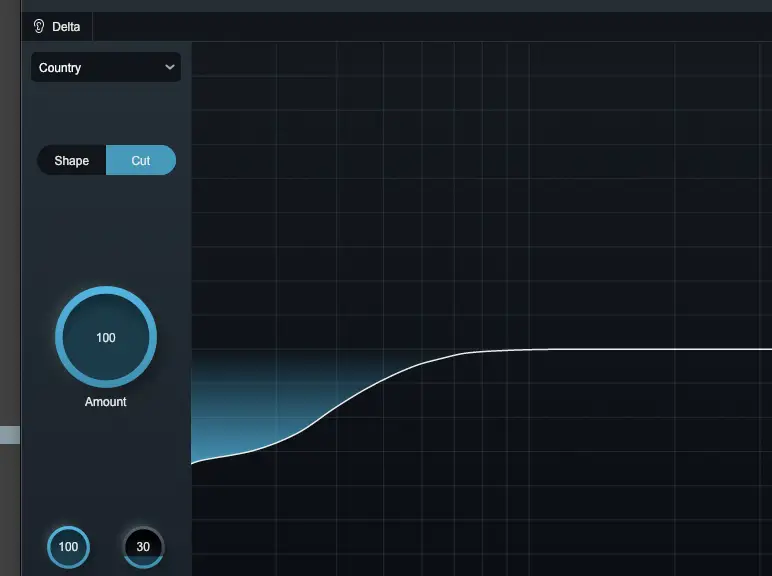
One place Stabilizer really shines is in mid/side mode. It lets you clean up the stereo field by isolating and fixing problem frequencies, giving your mix clarity and depth without messing with its vibe. Whether it’s harsh highs or muddy lows, Stabilizer keeps your mix clean without stripping its character.
Pro Tip: Switch it to Cut mode for precise fixes. Use it in mid/side to tackle harsh highs on the sides while keeping the mids solid. Pair it with the Clarity module for an awesome one-two punch—Stabilizer handles the harshness, and Clarity smooths out the overall tone.
Another trick you should at least try on the next master is something that I’ve been loving in my own work lately. Drop Stabilizer later in your chain to clean up any resonances from earlier processing like slight attenuations of resonances that saturaiton may have brought to the sound. Its dynamic response helps your mix feels balanced and cohesive, even if things get complicated. Play around with its placement in your chain to get the most out of it.
Maximizer and Upward Compression
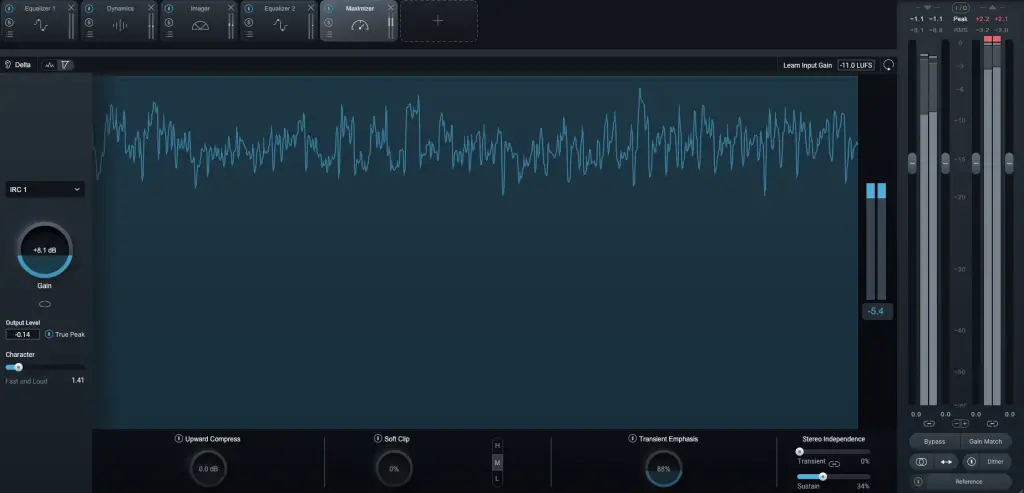
The Maximizer has been a go-to in Ozone for years, and with version 11’s upward compression, it’s even more usable and dope in the new version. While most people use it for loudness, its real power is in balancing dynamics. Upward compression adds depth and makes your mix feel more dimensional by bringing up the quieter details.
In IRC4’s transient mode, you can push for loudness while keeping your transients intact. Pair that with some light upward compression, and you can keep your track punchy and detailed. This combo is especially great for electronic and dance tracks where dynamics are everything and you need those punchy and dynamic highs without loosing the full-force of a well-compressed sub range.
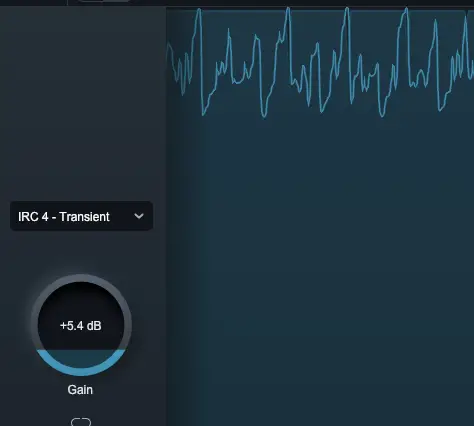
Pro Tip: Keep your upward compression settings subtle and watch the low end. If you notice sub-bass getting lost, tweak it with EQ after the Maximizer. Try pairing upward compression with tape-style saturation for warmth—it’s a killer way to add richness without losing clarity. And always use gain-matching to hear exactly what the Maximizer is doing.
Another move? Play with the attack and release settings to dial in how the Maximizer reacts to your track. It’s a small adjustment that can make a big difference in how tight and dynamic your mix feels.
Shaping Dynamics with Impact
Impact isn’t usually the first tool people reach for, but when you do, it can completely transform how your master feels. It’s built for controlling microdynamics across different frequency bands, letting you dial in punch and clarity exactly where you need it. Whether you’re giving your kick more weight or adding snap to a snare, Impact helps you pull those details forward without throwing off the rest of the mix.
What makes Impact so versatile is its multi-band control. You can tighten up muddy low mids, add more transient clarity to the highs, or even smooth things out across the spectrum. It works perfectly alongside other modules in your chain to shape your track and get the balance just right.
Pro Tip: Work on one frequency band at a time. If your mix feels muddy, focus on the low mids first and use Impact to clean them up. Boost the higher mids slightly to make your snares and percussion stand out more. Always check in mono to keep phase issues in check.
Short attack times are great for adding punch to your drums, while longer releases smooth out dynamics. Don’t skip the delta function—it’s a lifesaver for hearing exactly what Impact is tweaking, so you can fine-tune your adjustments and really dial in your sound.
Leveraging Dynamic EQ
Dynamic EQ in Ozone 11 might not always get the attention it deserves, but it’s hands-down one of the most flexible tools in your mastering arsenal. Unlike static EQ, which applies changes across the board, Dynamic EQ only kicks in when it’s needed. That makes it perfect for handling tricky resonances or smoothing out dynamic inconsistencies while keeping your mix feeling natural and balanced.
For vocals, it’s a game-changer. You can tame sibilance without making the whole track sound dull. In the low end, it’s a pro at managing bass frequencies that might otherwise muddy up the mix. By fine-tuning the thresholds and frequency ranges, you can zero in on problem areas while keeping the rest of your sound intact.
Pro Tip: Use the solo function to pinpoint resonant peaks but not when doing other EQ moves (remember, mixing is all about placing instruments in context of other instruments). Apply dynamic cuts to fix those specific frequencies without affecting the rest of the mix. For the ultimate cleanup combo, pair Dynamic EQ with Stabilizer. Together, they handle frequency issues with precision while keeping your track musical.
Dynamic EQ also curshes it when it comes to keeping your mix consistent across a playlist with different tonalities. Whether you’re taming boomy bass, smoothing out harsh vocals, or just adding polish, it works without sacrificing the character of your mix. It’s that tool you didn’t know you needed, but once you start using it, you’ll wonder how you ever worked without it.
Letting the Mastering Assistant Be Your Guide

The AI Mastering Assistant in Ozone 11 often gets dismissed as a beginner’s tool by some and the devil by [albiet purist] others, but it’s actually an incredible asset when you know how to use it. Instead of thinking of it as a shortcut or the final step, treat it like a second set of ears. It’s great for catching things you might miss and can give you a clear starting point for dialing in EQ, dynamics, and stereo balance.
What makes it so useful is that it analyzes the loudest and most dynamic parts of your track, tailoring its suggestions to where it really matters. That means instead of vague, one-size-fits-all recommendations, you’re getting insights based on your specific mix. But here’s the key: don’t just accept its settings as-is. Use them as a guide, dig into the modules it selects, and tweak them to match your vision. Understanding why it made certain choices can give you a deeper insight into your track and the mastering process.
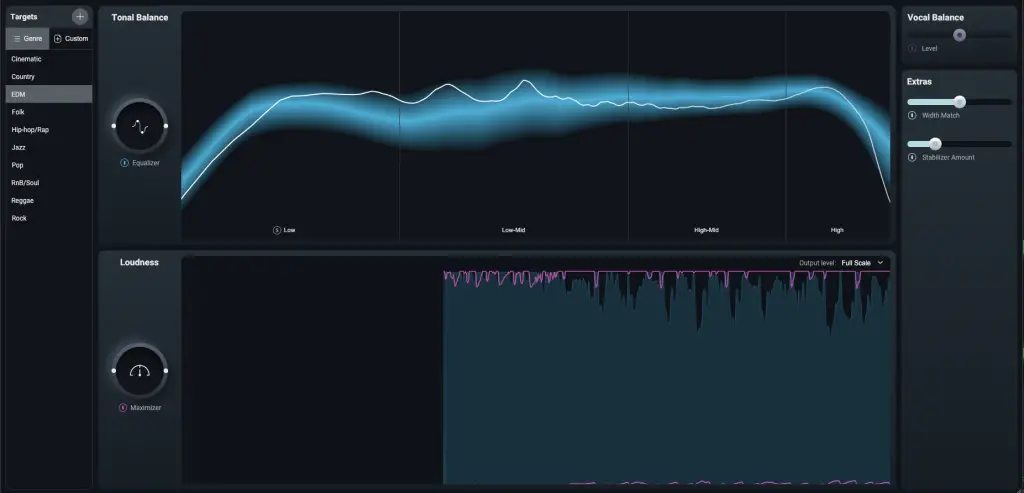
Pro Tip: Think of the Assistant’s output as a conversation starter. Use its EQ and dynamics suggestions as a foundation, then refine them to fit your track’s needs. Play around with reordering the modules—like moving the Maximizer earlier in the chain—to see how it affects your dynamics. These small adjustments can lead to surprisingly big improvements.
Even if you’re experienced, the AI Mastering Assistant can still provide fresh perspectives. It’s not about letting it take over—it’s about using it as a learning tool to sharpen your ears and uncover areas to improve. By treating it as a collaborator rather than a solution, you can achieve results that feel polished, tailored, and totally your own.
Mixing Modules Together for Cohesion and Power
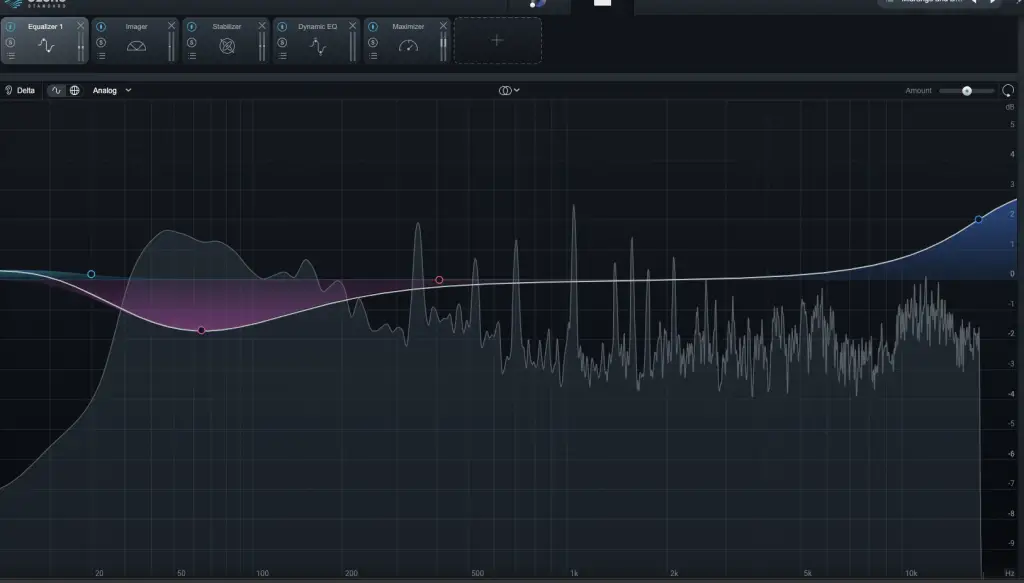
The real power of Ozone 11 isn’t just in its individual modules—it’s in how you combine them. Pairing tools like Dynamic EQ and Stabilizer creates a workflow that’s precise yet musical, tackling problem frequencies while enhancing tonal balance. When you start thinking about these modules as a team, you get way more control over your mastering process.
Playing around with module order can unlock some surprising results. For example, putting Impact after the Maximizer can add punch and cohesion that might not happen otherwise. Or try combining Clarity and Impact—they work together to shape tonal balance and dynamics at the same time, giving your track a polished, cohesive sound. Understanding how these modules interact is what takes Ozone 11 from good to next-level.
Pro Tip: Use Dynamic EQ for those precise fixes, then follow it up with Stabilizer to smooth out the tonal balance. If you’re feeling adventurous, try unconventional module placements—Impact after the Maximizer, for instance, can really tighten things up. Clarity and Impact are also a killer combo for dialing in both tonal and dynamic adjustments at once.
The key to getting the most out of Ozone 11 is customizing your workflow. By digging into how the modules work together, you can build a mastering chain that’s perfectly tailored to your track. This flexibility is what makes Ozone 11 such a standout tool for mastering.
All Mastering Tips Require A Thoughtful Approach
Mastering is as much an art as it is a science, and tools like Ozone 11 are at their best when used with intention. The key is to see its modules not as one-size-fits-all solutions but as components of a dynamic, nuanced workflow. Whether it’s the Clarity module brightening a dull mix, the Maximizer adding dynamic balance, or Impact shaping punch and weight, each tool offers unique opportunities to elevate your sound.
Ozone 11 provides the tools, but the magic happens when you bring your expertise and intuition into the process. Take the time to explore its lesser-known features, tweak them to your liking, and remember that every track tells a story. With Ozone 11, you have everything you need to amplify that story and make it shine.
The post Lesser-Known Mastering Tips You Need to Try To Take Your Masters Further appeared first on Magnetic Magazine.


