Table of Contents
Banksia is an incredibly talented producer emerging from the San Francisco scene and making a strong impact in twenty twenty-four. Despite being a relatively new artist, he has already performed alongside prominent names in electronica, such as Bicep, DJ Seinfeld, Peggy Gou, and others. Impressively, his debut release was on Rüfüs Du Sol’s Rose Avenue imprint.
His latest release, “The Shire,” captivated me as a huge Lord of the Rings fan and met all my expectations. The track isn’t filled with flutes or whimsical Hobbit-inspired sounds; instead, it’s a breakbeat, texturally rich piece inspired by nature.
In the latest edition of How It Was Made, we’ll explore the creation of this track so be sure to listen to the track below to get a sense of the unique elements he’s bringing to the table before we dive into the details of the project.

Prophet Rev 2

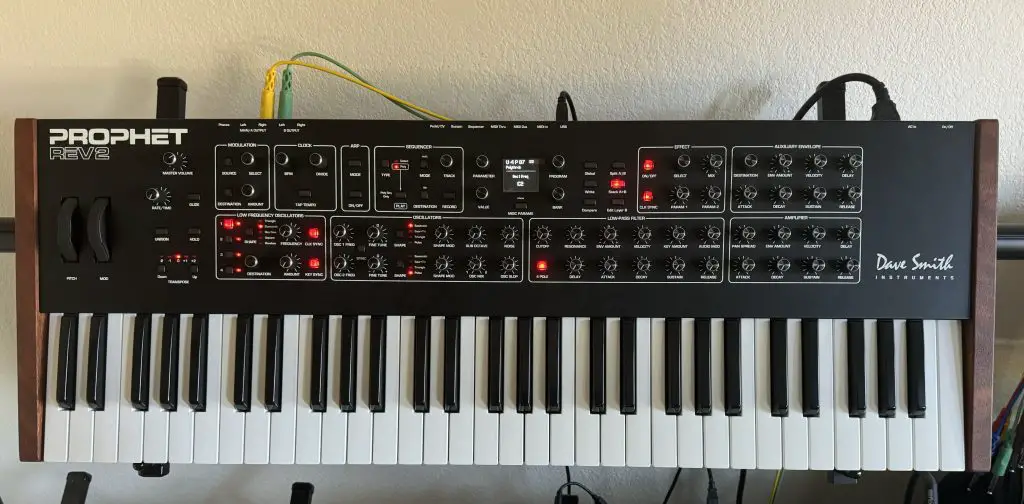
Many of the synth elements in “The Shire” are made on my Dave Smith Prophet Rev 2, an incredible piece of hardware. It was one of the first synths that I got as a gift from my family, and it has been one that I have loved and learned over time. I still don’t know everything about it and continue to unlock new possibilities every time I use it. I think not knowing everything about the synth is a great way to make happy mistakes and come up with sounds that you typically wouldn’t have imagined or had the goal to make right off the bat.
Regarding how I used it on this particular track, I was initially trying to make a Reese bass layer. The loop I started to build originally had this 303 acid bassline on it when I was exploring ideas and then I decided I wanted to add a Reese under it. However, as I was programming the synth to get to a Reese, I came up with this aggressive, dark, gritty synth lead that I fell in love with.
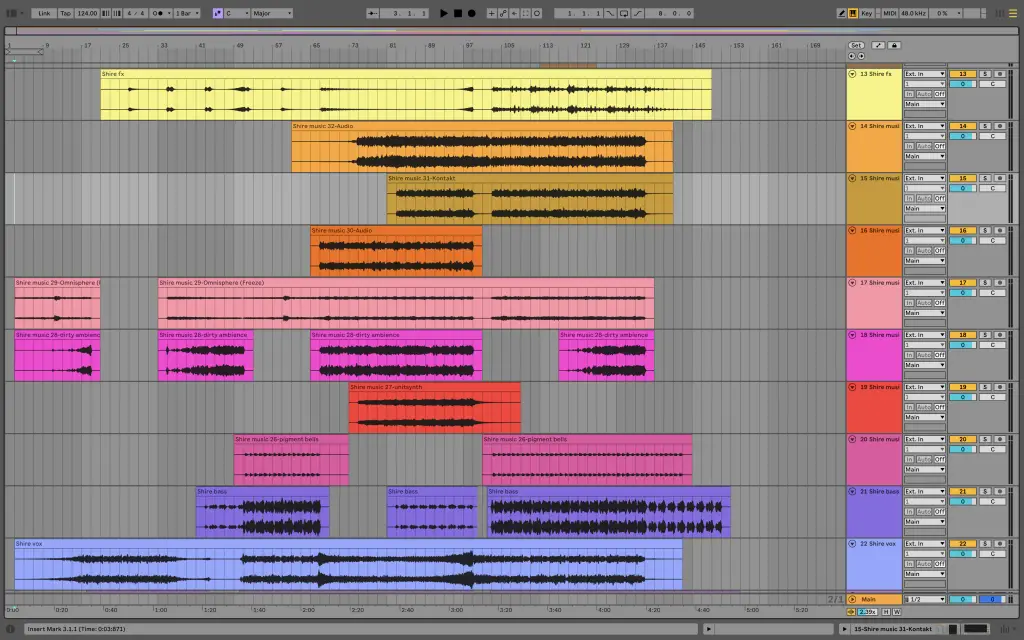
It had a quick attack with high sustain but an extremely short release, almost making it cut off right when I let go of the keys. I then started playing a few notes on the higher and lower ends of the keyboard, leading to a low Reese bass sound and an arpeggiated note roll on the high pitches. Once I landed on this 8-bar loop, I started to layer different elements to fill the entire EQ spectrum. When I produce, I try to listen for frequency holes across the spectrum and think through elements that could fill those gaps to eventually land on a group of elements and ideas that can lead to a full arrangement. Having the main synths come from the Rev 2 filled a lot of the frequency spectrum as it has a warm sound.
Compared to a few other Dave Smith synths the Rev 2 has a darker sound, and you can create sounds with many harmonics. I already had a lot in the low end and mids from the Rev 2, so I turned to my favorite software synth, “Omnisphere.” That’s where the sustained pad comes from, and grouping these two synths led to one main lead. Honestly, I didn’t even program anything or change anything on Omnisphere; it was a preset straight from the synth that complemented the Rev 2 well. The beauty of Omnisphere is that it has hardware integration, so you can link it to your Rev 2, and they can work in tandem.
On the overall group including the Rev 2 and Omnisphere, I added the stock Ableton LFO tool and mapped it to an EQ curve (also stock Ableton EQ) with a very low Rate and Depth. This created subtle movements by adding and cutting frequencies over time. Even though subtle, it is so effective and one of my favorite techniques to use in all of my productions to keep all of my repeating patterns interesting over time. If you’re an Ableton user, these come as stock plugins and I highly recommend exploring these types of techniques because they are usually the highly unnoticeable techniques that can make a good track, great.
Simpler Device

One creative plugin that I use on every project is the “Simpler Device,” a native Ableton Live tool. A little nugget of information, I don’t rely much on third-party plugins. In fact, I don’t own many third-party plugins because the Ableton native tools that come with the DAW are so good. My music often includes audio samples, and Simpler gives me tremendous control over what I can do with the audio while also providing some limitations that prevent me from over-exploring and losing the magic. The great thing about Simpler is that you can take any sound sample, drag it in, and have full control over MIDI notes, pitch, ADSR, filters, and more. This control over a small audio snippet is a game changer when you want to dial something in or explore a sample without overthinking it.
In ‘The Shire,’ I used Simpler on almost all the drums. I loaded a Simpler device on many of the tracks and loaded my kick drum, claps, snares, hats, percs, and other drum elements into each instance. For example, my original kick was an audio sample, but putting it into Simpler allowed me to do a few things:
1. It enabled me to program my kick pattern in MIDI, making it easy to try different kick drums without manually moving multiple audio samples each time I needed to change the pattern.
2. It gave me control over the kick’s length by adjusting the ADSR, allowing me to fine-tune the kick to exactly how I wanted it to be.
I recommend any Ableton producers to play around with Simpler. Whether for drum programming or sampling, it makes working with audio so much more fun. Try out the slice mode: I often put a vocal sample into Simpler, select slice mode, and let Ableton cut the sample into different slices. Then, I play around with the keys on my MIDI keyboard to find a combination of vocal chops I like. Just like that, you have a vocal chop that feels natural and exciting. If you want to take it a step further you can even automate the ADSR and this can lead to some interesting variation in your vocal chops where some are longer than others in length making the track constantly engaging. Again, you can add this trick to your bucket of subtle changes that keep a listener hooked.
Soothe2

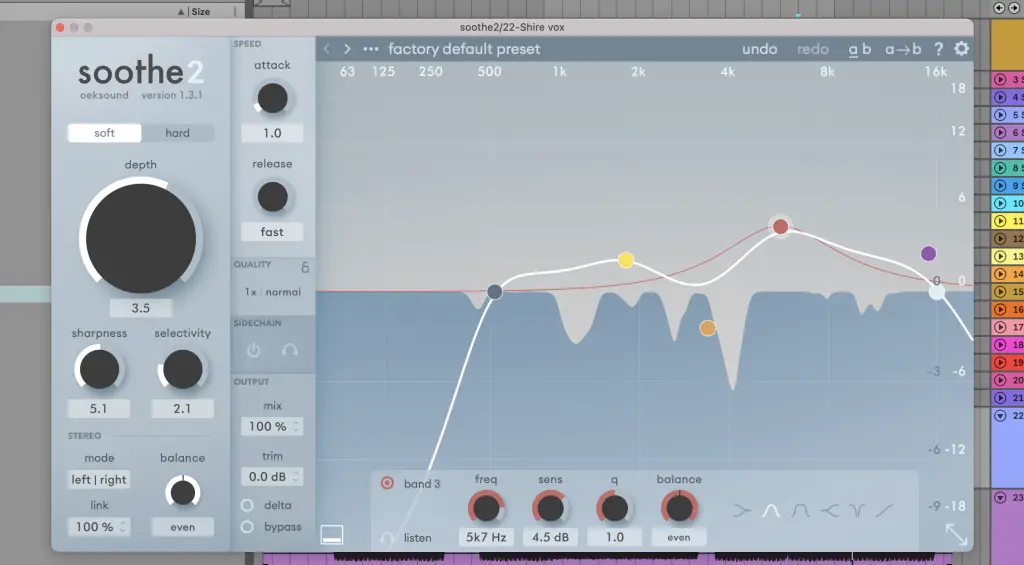
One of the very few third-party plugins I use often, and also had throughout this track, is Soothe2 by Oeksound. Soothe2 is a dynamic resonance suppressor. In simpler terms, it automatically identifies problematic resonances (frequencies) and applies matching reduction to the frequencies that are causing issues. You can then control things like the depth, sharpness of the EQ, and sensitivity. For a long time, I used to manually do this with an EQ. I’d create a sharp EQ bell curve and drag it up and down the frequency spectrum to find problematic frequencies, repeating this process if I had some audio samples that were not great quality but really wanted to use. Many times, I would miss frequencies because I got too tired of the manual process. With Soothe, it is quick and easy. The nice thing about Soothe is that you can choose the specific range of frequencies you want it to affect, giving you a lot of control without having to be ultra-surgical in finding problematic frequencies in your mix.
In this track, I used Soothe a lot on the vocal sample, but also on the percussion, because some of the percussion samples I used had several piercing frequencies in the highs. Using Soothe allowed me to tame those frequencies so they don’t hurt the ear when listening to the track by adding some reduction to those sharp frequencies.
I recommend producers start using Soothe on their drum tracks when learning how to use the tool. For me, it made it easier to understand how it works and what it affects before I started using it on other sound sources. A lot of it has to do with ear training, and at first, I was still learning to use Soothe. Understanding what it targets and how it impacts the audio on drums allowed me to get comfortable hearing how it affects things like vocals, synths, and more. So, I highly recommend trying it out on your drums, especially on elements like snares and hi-hats—anything that sounds really sharp and falls in the higher end of the frequency spectrum.
Quick Fire Tips For Making Electronica
Tip #1: Bounce to Audio
After creating something in MIDI using a plugin or synth, bounce it to audio. This helps you commit to your decisions and prevents overthinking, which can lead to regret over unnecessary changes.
Tip #2: Don’t Spend Too Much Time on One Idea
If you feel like you’re forcing an idea, it’s a sign to close the project and start a new one. Don’t be discouraged; even a small loop or idea can spark inspiration later. Save it in an “ideas folder” for future use.
Tip #3: Set a Timer to Avoid Distractions
If you get easily distracted or hit writer’s block, set a 10-minute timer. During this time, focus on creating as quickly as possible. This time constraint helps you avoid overthinking and can lead to some of your best work by relying on instinct and experience.
Tip #4: Learn Your Tools
Avoid spending money on expensive plugins and hardware if you don’t understand their core functions. Every DAW comes with essential tools like EQs and compressors. Learn the basics of these tools first, then make informed decisions on what to purchase based on your needs.
Tip #5: Build a Trusted Feedback Network
Create a network of trusted producers and non-producers for feedback. Producers can give you technical advice, while non-producers can provide the perspective of a general listener. This balanced feedback helps you improve your music for both technical quality and listener enjoyment.
The post How It Was Made: Banksia – The Shire (Ordinary Pleasures) appeared first on Magnetic Magazine.


